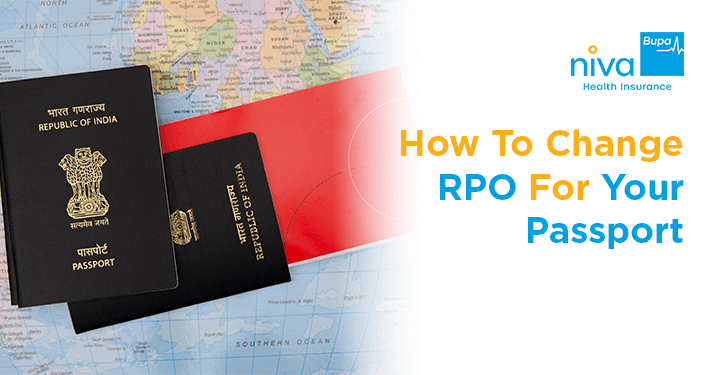
What is RPO in Passport: How to Change RPO for Your Passport?
19 November, 2024
22 Shares
40417 Reads
Share
If you've ever applied for a passport in India, you may have come across the term Regional Passport Office, or RPO. Understanding what is RPO in passport processing and how it affects your application is essential, especially if you've relocated and need to update this information. The Regional Passport Office (RPO) is a key component in passport services and plays a crucial role in issuing, renewing, and managing Indian passports.
What is RPO in Passport?
The Regional Passport Office (RPO) is an office managed by the Ministry of External Affairs in India. RPOs are responsible for processing and managing passport applications, renewals, and related services within a designated geographical region. When you submit an application for a new passport, renewal, or change in details, the RPO assigned to your region oversees the processing, verification, and issuance of your passport.
In simple terms, the RPO is the official body that handles all passport-related activities for residents within its jurisdiction. Each RPO serves a specific area, ensuring streamlined processing and managing local verification through police and administrative checks. When you apply for a passport, your application is assigned to the RPO corresponding to your place of residence, which is why updating your RPO is essential if you move to a different state or city.
Read Also: How to Apply for a Passport Online?
What are the Types of Passport Offices in India?
India has a well-structured passport issuance system, comprising different types of passport offices that cater to applicants based on their location and requirements. The main types of passport offices in India include:
Regional Passport Offices (RPOs) – These are the primary passport-issuing authorities in various regions. They oversee the entire passport application process, including issuance, reissue, and grievance redressal. RPOs also handle complex cases, such as legal matters or diplomatic passports.
Passport Seva Kendras (PSKs) – These centres function as service delivery points where applicants submit documents, provide biometrics, and complete verification. While PSKs process applications, the final decision is taken by the respective RPO.
Post Office Passport Seva Kendras (POPSKs) – To extend passport services to semi-urban and rural areas, the Ministry of External Affairs has partnered with India Post to set up POPSKs. These centres operate within post offices and provide passport application services similar to PSKs.
Passport Application Collection Centres – Some embassies, consulates, or third-party agencies are authorised to collect applications and forward them to the appropriate passport office for processing.
Each type of passport office plays a distinct role in making the passport issuance process accessible and efficient for citizens across India.
What is RPO in Passport: How to Change RPO for Your Passport?
Changing your Registered Regional Passport Office (RPO) in your passport is not a standalone process. Instead, it is done while applying for the Reissue of Passport with your new address. The Regional Passport Office is assigned based on your current residential address. When you move to a new city or state, the RPO linked to your old address becomes irrelevant. Therefore, updating your RPO ensures that your passport is processed through the correct office corresponding to your new residence, which helps avoid delays in verification and reissuance. Below is a detailed step-by-step process to change your RPO efficiently.
Gather the Necessary Documents
Before you begin the RPO change process, having your documents ready is the single most important step. Incomplete or mismatched documents are the most common reasons for delays, rescheduled appointments, and rejected applications. Here is everything you need to prepare before starting your reissue application:
Identity Proof (any one of the following):
Aadhaar Card
PAN Card
Voter ID Card
Driving Licence
Proof of New Address (any one of the following, reflecting the new address):
Aadhaar Card updated with new address
Recent electricity, water, or gas bill (not older than one year)
Bank passbook or statement with current address (not older than one year)
Registered rent agreement (if living in rented accommodation)
Leave and Licence Agreement
Existing Passport:
Original passport (current or expired)
Self-attested photocopy of the first two and last two pages, including any observation pages
Supporting Documents (if applicable):
Marriage certificate (if name has changed)
Legal name change affidavit (if applicable)
Birth certificate or school leaving certificate (as proof of date of birth if required)
Important Document Checklist Before You Submit:
Aadhaar address updated to reflect new residence
All address proof documents show the same address as the application form
Passport photocopies are self-attested and legible
The rent agreement is currently valid and registered
No spelling discrepancies across documents
Application form address matches proof of address exactly
Having all documents verified and consistent before your PSK appointment significantly reduces the chance of delays or rescheduling. It is also a good time to arrange your insurance for a trip or travel policy insurance for any upcoming international travel, since passport reissue timelines can affect your departure dates. A comprehensive trip holiday insurance plan covering trip cancellations ensures that even if your passport reissue takes longer than expected, your prepaid travel bookings are financially protected.
Step 1: Visit the Passport Seva Website
The first step in changing your RPO is to access the Passport Seva Portal. This is the official online portal of the Ministry of External Affairs (MEA) for passport services in India.
Go to www.passportindia.gov.in.
If you already have an account, log in using your existing credentials. Make sure the details match your passport and identification documents.
If you don’t have an account, you need to create a new account by providing your personal details, email address, and mobile number. The portal will send a verification link or OTP (One-Time Password) to confirm your registration.
By using the official portal, you can safely manage your passport application, book appointments, pay fees online, and track the status of your application without visiting the office multiple times.
Step 2: Select “Reissue of Passport”
Once logged in, navigate to the option “Apply for Fresh Passport/Reissue of Passport”.
Choose the “Reissue of Passport” option, which is specifically meant for individuals who need to update their passport due to change in address, expiry, or other details.
In the reason dropdown, select “Change of Address”. This is important because your residential address automatically determines the RPO. By choosing this option, the system ensures your application is routed to the correct RPO corresponding to your new location.
This step is crucial because selecting the correct reason ensures the portal assigns the proper RPO and avoids unnecessary complications in processing your application.
Step 3: Fill Out the Application Form
In this step, you need to provide detailed information about your new residential address.
Enter your complete new address, including house number, street, city, state, and postal code.
The portal will automatically assign the new RPO based on the pin code and city of your new residence. This eliminates the need to select the RPO manually and ensures the correct regional office handles your passport application.
Ensure that the address you provide matches your proof of residence documents, such as Aadhaar, electricity bill, or rental agreement. Any discrepancy between the entered address and the submitted documents may result in delays or additional verification processes.
Step 4: Submit and Pay the Fee
After filling out the application form, you must submit it online and pay the passport reissue fee.
The payment can be made via net banking, credit/debit card, UPI, or other online payment methods accepted by the Passport Seva Portal.
Once the payment is successful, download the Application Receipt (ARN – Application Reference Number). This receipt is crucial as it contains your application details and appointment reference. Keep a printout or digital copy for future reference.
The fees for reissue of passport vary based on the type of passport book (36 pages or 60 pages) and whether the application is regular or tatkal. Paying the fee online ensures immediate confirmation and faster appointment booking.
Step 5: Book an Appointment
Next, you need to book an appointment at the Passport Seva Kendra (PSK) or Post Office Passport Seva Kendra (POPSK) under your newly assigned RPO.
Select a PSK/POPSK that is convenient for you. The portal will display availability based on your new RPO.
Choose a date and time slot that suits your schedule. Keep in mind that popular centers may have longer waiting periods, so booking early is advisable.
Booking an appointment under the correct RPO ensures your documents are processed in the office that has jurisdiction over your new residential address. This is critical because police verification and other administrative procedures are handled by the RPO linked to your updated address.
Step 6: Visit PSK/POPSK with Documents
On the day of your appointment, visit the selected Passport Seva Kendra or Post Office Passport Seva Kendra with all required documents. The typical documents required include:
Current passport (original and photocopy)
Proof of new address: Aadhaar card, utility bill, rental agreement, or other valid address proof
Application receipt (ARN)
It is recommended to carry additional identity proof such as PAN card or voter ID in case the officials request further verification. Missing or incomplete documents may result in rescheduling of your appointment.
At the PSK/POPSK, officials will verify your documents, take biometric details (photo and fingerprints), and guide you through the next steps of the application.
Step 7: Verification and Processing
After document submission, your details will be verified by the Passport Seva officers. Depending on your new address, police verification may also be required.
Police verification is a standard procedure for reissue applications that involve a change of address. A police officer may visit your new residence to confirm the address and verify your identity.
Once verification is completed successfully, the passport will be reissued with the updated address and the new registered RPO.
The processing time varies, but most reissue applications are completed within 2–4 weeks from the date of submission, assuming no additional verification or complications arise.
This step is essential to ensure that your passport is correctly linked to your new address and processed through the proper regional office, preventing future issues related to travel, visa applications, or identity verification.
Changing your RPO in the passport ensures that your application is routed to the correct office for processing. It helps in avoiding delays due to jurisdictional mismatches and makes the verification process smoother. It is particularly important for individuals who have recently relocated to a different city or state, as the RPO handles all passport-related processes within its jurisdiction.
By following the step-by-step procedure above, you can efficiently update your address and RPO while applying for a passport reissue. Accurate information and proper documentation are crucial to avoid errors, unnecessary rescheduling, or rejections.
Additionally, understanding the importance of your RPO helps in tracking your passport application efficiently. The RPO is responsible for all administrative and verification processes in its area, including coordination with local police authorities for address verification. Being aware of the correct RPO and its procedures ensures a faster, hassle-free experience.
Secure Your Passport with the Best Travel Insurance
While the passport application process is being completed, it is also a good practice to consider insurance for travelling. Travel insurance not only protects you during trips abroad but also provides peace of mind in case of lost or stolen passports, medical emergencies, or travel delays. Securing your travel documents alongside a reliable travel policy insurance plan is a proactive step for smooth international travel. Whether you need comprehensive insurance for travelling for a long-haul trip or a simple trip holiday insurance for a short holiday, arranging it alongside your passport reissue means you are fully prepared from the moment your new passport arrives.
How is the Regional Passport Office Different from Passport Seva Kendra?
While both the Regional Passport Office (RPO) and Passport Seva Kendra (PSK) play crucial roles in the passport issuance process, they serve different functions:
In summary, while PSKs facilitate the initial application process, the RPO has the final authority in issuing passports.
Reasons for Changing Your Regional Passport Office (RPO)
There are several situations where changing your Regional Passport Office might be necessary. Here are some of the most common reasons:
If you move to a different state or a city outside your current RPO’s jurisdiction, changing your RPO ensures that future passport services are managed by the office in your new region.
In some cases, individuals might move to a new region after marriage, requiring an RPO update.
People with jobs that require frequent transfers may need to change their RPO to match their new residence.
Updating your RPO ensures that your passport-related services, such as renewals or police verification, are managed by the correct office.
How to Choose a Regional Passport Office?
Choosing the correct Regional Passport Office (RPO) is essential to ensure smooth processing of your passport application. Here are key factors to consider:
Residential Jurisdiction – Every RPO is assigned specific geographical areas. You must apply at the RPO corresponding to your permanent or current residential address.
Application Type – If you are applying for a fresh passport, reissue, or a Tatkal passport, ensure that the RPO handles the specific service you require. Some complex cases (such as legal name changes or lost passports) may require direct interaction with the RPO.
Processing Efficiency – While processing times are generally standardised, some RPOs may have shorter queues or faster resolution times. Checking online reviews and timelines can help determine which office is more efficient.
Accessibility – Choose an RPO that is easily accessible, as you may need to visit for urgent matters or escalations. Most RPOs are located in major cities, but their jurisdiction may cover surrounding areas.
Escalation and Grievance Redressal – If you anticipate any complications with your application (such as prior police verification issues or incorrect documentation), selecting an RPO with a strong grievance redressal system can be beneficial.
Your RPO will play a critical role in the passport issuance process, so selecting the right one based on your residence and application requirements is essential.
List of Regional Passport Offices in India
India has multiple Regional Passport Offices (RPOs) to cater to applicants across the country. Below is a list of major RPOs:
1. Northern India
Delhi
Chandigarh
Lucknow
Jaipur
Dehradun
2. Western India
Mumbai
Pune
Ahmedabad
Bhopal
Panaji
3. Southern India
Chennai
Bengaluru
Hyderabad
Cochin
Thiruvananthapuram
4. Eastern and North-Eastern India
Kolkata
Bhubaneswar
Guwahati
Ranchi
Patna
5. Central India
Raipur
Nagpur
Indore
Each RPO oversees multiple states and cities within its jurisdiction. Applicants must visit the RPO corresponding to their residential address for passport-related queries and escalations.
How to Change the Regional Passport Office for Your Passport
Changing your Regional Passport Office may sound complicated, but the process is quite straightforward if you follow the right steps. Here’s how to make the change:
Step 1: Apply for a Reissue of Passport
To change your RPO, you’ll need to apply for a reissue of your passport. The reissue process includes updating your new address, which will automatically trigger a change in RPO if your new address falls under a different jurisdiction.
Log in to the Passport Seva portal, an official platform managed by the Ministry of External Affairs.
Select the option for reissue and specify the reason, which in this case would be a change of address or relocation.
Step 2: Fill Out the Application Form
Complete the application form with your new address details and other necessary information. Ensure that the address provided corresponds to your new place of residence, as this will determine your new RPO.
Step 3: Upload Necessary Documents
Upload proof of your new address. Acceptable address proofs include a rent agreement, utility bill, bank statement, or Aadhaar card with your updated address. Ensure all documents are current and meet the requirements specified on the Passport Seva portal.
Read Also: Essential Documents for Passport Application in India
Step 4: Pay the Reissue Fee
A reissue application comes with a standard processing fee, which can be paid directly on the Passport Seva portal. Once payment is completed, you will receive an application reference number, which you can use to track the status of your application.
Step 5: Schedule an Appointment at the Nearest Passport Seva Kendra (PSK)
Book an appointment at the Passport Seva Kendra in your new location for document verification and biometrics. During this appointment, submit all original documents for verification and ensure that your application reflects the updated address and RPO.
Step 6: Complete Police Verification
Once your application is processed, a police verification will be conducted at your new address. This verification is crucial, as it ensures that the new address is accurate and confirms your residence within the new RPO’s jurisdiction.
Step 7: Receive Your Updated Passport
Upon successful verification, you will receive your reissued passport with the updated address and RPO details. This passport will now reflect your new RPO, making any future passport services seamless within the new jurisdiction.
Conclusion
Understanding what is RPO in passport processing and how to change it is essential for anyone relocating to India. By updating your Regional Passport Office, you ensure that your passport services are handled efficiently in your new location. Whether due to a job transfer, marriage, or a move to a new city, updating your RPO keeps your travel plans on track.
Now that you are all set with your passport, one important thing you are forgetting is your travel insurance. Worry not, with our travel plans, you can relax and focus on enjoying the visit instead of stressing over the unexpected. As you plan your journey, ensure peace of mind with comprehensive travel insurance. Safe travels!
FAQs
1. Can I collect my passport directly from the RPO instead of having it delivered?
No, passports are generally dispatched through Speed Post to the applicant's registered address. However, in exceptional cases, such as urgent travel or lost passports, collection from the RPO may be allowed with prior approval.
2. Is it possible to apply online for the reissue of my passport?
Yes, you can apply for a passport reissue online through the Passport Seva website. However, you will still need to visit a Passport Seva Kendra (PSK) or Post Office Passport Seva Kendra (POPSK) for biometric verification and document submission.
3. Can I visit the Regional Passport Office (RPO) without an appointment?
If you are confused about how to change registered RPO in passport seva? It is advisable to have an appointment before visiting the RPO, especially for general enquiries. However, in emergency cases, such as lost passports or urgent travel requirements, walk-in visits may be considered.
4. How can I check the status of my application at the RPO?
You can check the status of your passport application online via the Passport Seva website by entering your application reference number. Alternatively, you can contact the RPO through their helpline or visit the office in case of urgent concerns.
5. Can I escalate my passport application issue at the RPO?
Yes, if you face delays or complications with your application, you can escalate the issue at your respective RPO. It is recommended to carry all relevant documents and proof of application status when visiting the RPO for resolution.
This comprehensive guide covers everything you need to know about Regional Passport Offices in India. If you have any further queries, you can visit the official Passport Seva website or contact your nearest RPO.
6. How to change RPO in passport?
People often get confused when talking about how to change RPO in passport seva? To change the Regional Passport Office (RPO) for your passport, you need to update your application details. Click passport nic in Login on the Passport Seva website, select ‘Re-issue of Passport’, and update your new address. The system will automatically assign the corresponding RPO based on your address. Submit the application, pay the fee, and schedule an appointment at the designated Passport Seva Kendra (PSK) or Post Office Passport Seva Kendra (POPSK).
7. How many days will I get my passport?
The time taken to receive a passport depends on the type of application:
Normal Passport: Usually issued within 30–45 days after police verification.
Tatkal Passport: Typically issued within 1–3 days after verification.
Processing time may vary depending on police verification and document verification status.
8. How can I track my passport delivery?
You can track your passport delivery status through the Passport Seva website. Log in, enter your file number, and check the status under ‘Track Application Status’. Alternatively, if dispatched, you will receive an SMS with the tracking details, and you can track it on the India Post website using the provided consignment number.
9. How can I check my passport details online in India?
To check your passport details online, visit the Passport Seva website and log in with your registered credentials. Go to the ‘View Saved/Submitted Applications’ section to access your application details. If you need to verify passport details, you can also use the mPassport Seva app.
10. Can I choose any RPO for my passport?
No, you cannot choose any RPO at your discretion. The RPO is assigned based on the residential address mentioned in your passport application. If you move to a different city, you must update your address, and the system will automatically assign the corresponding RPO.
Stay protected against medical emergencies, trip delays, and lost baggage worldwide.

Popular Searches
Health Insurance - Health Insurance | Best Family Health Insurance | Best Health Insurance For Senior Citizens In India | Health Insurance With Opd Cover | Mediclaim Insurance | Critical Illness Insurance | Personal Accident Insurance | Mediclaim Policy | Individual Health Insurance | Maternity Insurance | Best Health Insurance company | NRI Health Insurance
Health Insurance Schemes - PMMVY Login | PMJJBY Policy Status | Swasthya Sathi Card | PMSBY | ABHA Card Download | PMJJBY | Ayushman Card | PMMVY 2.0 | Ayushman Vay Vandana Card | PMMVY NIC IN रजिस्ट्रेशन | PMMVY 2.0 लॉगिन
Travel Insurance Plans - Travel Insurance | International Travel Insurance | Student Travel Insurance | Travel Insurance USA | Travel Insurance Canada | Travel Insurance Thailand | Travel Insurance Germany | Travel Insurance Dubai | Travel Insurance Bali | Travel Insurance Australia | Travel Insurance Schengen | Travel Insurance Singapore | Travel Insurance UK | Travel Insurance Vietnam | Travel Insurance Japan | Travel Insurance Spain | Travel Insurance Asia | Travel Insurance Netherlands | Travel Insurance Turkey | Travel Insurance Ireland | Travel Insurance Phillipines | Travel Insurace Italy | Travel Insurance France | Travel Insurance China | Travel Insurance Georgia | Travel Insurance South Africa | Travel Insurance Maldives | Travel Insurance Portugal | Travel Insurance Malaysia | Travel Insurance Qatar | Travel Insurance Poland | Travel Insurance Greece | Travel Insurance New zealand | Travel Insurance Saudi Arabia | Travel Insurance Sri Lanka
Become an Agent - Insurance Agent | Insurance Advisor | Licensed Insurance Agent | Health Insurance Consultant | POSP Insurance Agent | IRDA Certificate Download | IC 38 Exam | Insurance Agent vs POSP | IRDA Exam Syllabus | IRDAI Agent Locator | IRDA exam fee | Paise Kaise Kamaye | Ghar Baithe Paise Kaise Kamaye
Top Hospitals - Best Hospitals in Chennai | Top Hospitals in Delhi | Best Hospitals in Gurgaon | Best Hospitals in India | Top 10 Hospitals in India | Best Hospitals in Hyderabad | Best Hospitals in Kolkata | Best cancer hospitals in Bangalore | Best cancer hospitals in Hyderabad | Best cancer hospitals in Mumbai | Best cancer hospitals in India | Top 10 cancer hospitals in India
Others - Ayushman Bharat | Gst Refund for NRI on Health Insurance Premium | Health Insurance Tax Deductible
Health & Wellness - शिलाजीत के फायदे हिंदी | Weight Gain Diet in Hindi | Sat Isabgol Uses In Hindi | Aloe Vera Juice Benefits in Hindi | Dragon Fruit Benefits in Hindi | Akal Daad in Hindi | Acidity Home Remedies in Hindi | Nikat Drishti Dosh in Hindi | Yoga Benefits in Hindi | Laung Khane ke Fayde in Hindi | Leukoplakia in Hindi | Protien in 100g Paneer | Benefits of Rice Water For Skin | B12 Deficiency Symptoms in Hindi | Fibre Foods in Hindi | Chronic Disease Meaning in Hindi | Vitamin D Foods in Hindi | Blood Urea in Hindi | Beetroot Uses Good for Health
Calculator - BMI Calculator | Pregnancy Calculator | Pregnancy Calendar Based on Conception Date | Pregnancy Conception Date Calculator | Last Menstrual Period Calculator | BMR Calculator | GFR Calculator | Ovulation Calculator
www.nivabupa.com
+91 11 30902010
1860-500-8888
CIN: L66000DL2008PLC182918
IRDAI Registration No. 145
Corporate Office: 3rd Floor, Capital Cyberscape, Sector 59, Gurgaon
Registered Office: C-98, First Floor, Lajpat Nagar, Part 1, Delhi-110024, India